If you are a rookie player of solar panels, you may be confused, "Is the output of my SolarBag typical?" "And why does my SolarBag power output fluctuate?" From typical outputs in different latitudes to factors affecting solar panel output, this guide explains everything about how to maximize the output of your SolarBag.
The OptiSolex 400W SolarBag has a maximum peak power of 400W. Under ideal conditions (clear sky, midday), it typically reaches the peak power. Output power decreases significantly during cloudy weather or at dawn/dusk. The actual output power will be affected by various factors, such as light intensity (depending on time of day, weather, season,etc.), sunlight incidence angle, ambient temperature, cable length, controller efficiency, and battery state.
The Estimated Power Output of SolarBag at Noon in United States Varies with Different Latitudes
To help solar beginners who don't know whether the output of SolarBag is solid, we've provided a conservative estimation of the 440W SolarBag's output when laid flat at noon, across various latitude ranges in the United States during four seasons. The real-world results you achieve could potentially be higher than the figures shown below, but this baseline gives you a reliable reference to evaluate its performance.
|
Latitude Region (°N) |
Representative Areas |
Spring (Mar-May) |
Summer (Jun-Aug) |
Fall (Sep-Nov) |
Winter (Dec-Feb) |
|
20° ~ 30° |
Hawaii, Southern Florida |
300 - 340W |
350 - 370W |
280 - 320W |
250 - 290W |
|
30° ~ 40° |
Texas, California, Arizona |
270 - 310W |
310 - 330W |
250 - 290W |
200 - 250W |
|
40° ~ 50° |
New York, Illinois, Washington |
230 - 270W |
270 - 290W |
200 - 240W |
120 - 180W |
|
50° ~ 60° |
North Dakota, Interior Alaska |
180 - 220W |
210 - 230W |
150 - 190W |
Extremely Low (Likely <100W) |
*These figures are rough estimates. For specific data based on actual lighting conditions and individual states, please refer to Appendix 3.
Factors Affecting SolarBag Production
You may find that the actual output of your SolarBag won't always meet expectations, it'll be affected by various factors.
• Light intensity (depends on time of day, weather, seasons, etc.).
• Orientation and tilt (based on geographic location and seasonal changes).
• Temperature (excessive heat can reduce output efficiency). —this is due to the way silicon cells respond to heat.
When temperature rises, voltage drops while current remains nearly constant, resulting in a reduction overall.
The temperature coefficient shows how much performance changes per degree.
For example, with a coefficient of –0.19%/°F, a 400 W panel operating at 10 °F above 77 °F will lose about 7.6 W (producing ~392.4 W).
Cooler temperatures have the reverse effect, increasing both voltage and power.
In real-world use, sunlight intensity often has a greater impact than temperature—summer heat may bring stronger sunlight, while winter cold often coincides with weaker light.
Tips for hot days:
a. Elevate panels – leave at least 4 inches (10 cm) underneath to allow airflow.
b. Ensure ventilation – avoid blocking wind with objects or debris.
c. Keep panels clean – dirt traps heat and reduces light absorption.
AIM - A Solution To Enable Higher Output of SolarBag
Maximizing output efficiency could be challenging. That’s why we created AIM—a simple yet powerful approach to help you optimize your solar energy harvest.
The angle at which you install your solar panel — including both its orientation (which direction it faces) and tilt (the angle it leans from horizontal) — plays a major role in how much energy it generates. Just like how plants grow best when they get sunlight from the right direction, solar panels produce the most power when angled properly.
Orientation: Which Direction Should Your Solar Panel Face?
If you can’t adjust it frequently, here’s what you should do:
• Best Practice: Point the panels south with a tilt. This setup captures the most sunlight throughout the day in North America.
• Alternative Option: If you’re placing the panel on uneven ground, simply laying it flat on south-facing terrain (sloped toward the south) can work almost as well.
• Flat Setup: Even laying the panel completely flat (parallel to the ground) can still achieve around 90% of the potential output — not ideal, but acceptable for casual use.
Important Notes on Panel Direction:
• Facing North: Strongly discouraged — you’ll only catch reflected light, resulting in drastically lower performance.
• Facing Southeast: Higher output in the morning, but drops off by afternoon.
• Facing Southwest: Better output in the afternoon, weaker in the morning.
If your panel setup allows for adjustment throughout the day, you can track the sun to get even better performance:
• Morning: Face your panel east
• Midday: Face south
• Afternoon: Face west
This manual tracking helps maximize power generation throughout the day — especially helpful during shorter winter days or when charging large batteries.
Tilt Angle: How Much Should Your Panel Lean?
The tilt angle is how much the panel is inclined from horizontal. For south-facing panels (the standard in North America), this angle mainly depends on your location (latitude) andseason.

*This tilt angle refers to the angle between the solar panel and the ground surface.
Quick Rule of Thumb for South-Facing Panels:
• Summer: Tilt ≈ Your Latitude – 15°
• Winter: Tilt ≈ Your Latitude + 15°
• Spring/Fall: Tilt ≈ Your Latitude
This adjustment helps match the average height of the sun in the sky throughout the year.
Example (Los Angeles, ~34° N):
• Winter Tilt: 34° + 15° = 49°
• Summer Tilt: 34° – 15° = 19°
This simple seasonal tilt approach works well for most users. You don’t need to stress about perfectly adjusting the panel’s east-west angle during the day — since the sun’s position changes rapidly (~15° per hour), a rough visual alignment is usually good enough.
Avoiding these frequent setup errors can make a big difference in your solar panel’s performance:
• Mounting the panel vertically (90° tilt) – Unless you're in extreme northern or southern latitudes (near the poles), this angle is far from optimal and will drastically reduce output.
• Facing the panel north or placing it in shaded areas – This prevents the panel from receiving direct sunlight, which is essential for efficient charging.
Reminder: Always pay attention to both the orientation and tilt angle of your panel.
Incorrect placement is one of the most common reasons for unusually low power output — and it's easily avoidable.
The golden rule: Point your panel directly toward the sun for maximum energy capture.
*For region-specific recommendations on tilt angles, refer to Appendix 2.
Q: Why is the sun always positioned south? Why does the elevation angle vary with latitude?
A: In the Northern Hemisphere, the sun moves across the southern part of the sky throughout the day. That’s why solar panels in North America (and anywhere north of the equator) are generally installed facing south — it’s the direction that gets the most direct sunlight over the course of a day.
This happens because of Earth’s tilt (about 23.5°) and its orbit around the sun. Earth’s axial tilt causes the sun’s position in the sky to shift north or south with the seasons. But regardless of the time of year, if you're in the Northern Hemisphere, the sun never crosses the northern half of the sky — it stays southward.
Q: How Does the Sun's Path Change?
A: Picture Earth as a giant spinning top, orbiting the Sun with its axis tilted at about 23.5 degrees. This seemingly small tilt causes the subsolar point (where sunlight strikes Earth perpendicularly) to shift seasonally. This axial tilt is the fundamental cause of Earth’s seasons and variations in the sun’s apparent position.
The Sun's "Golden Zone": The Tropics
Earth’s tilt defines the northern and southern limits for the subsolar point:
• Tropic of Cancer (~23.5°N): Northernmost point reached by the subsolar point (June Solstice, ~June 21).
• Tropic of Capricorn (~23.5°S): Southernmost point reached (December Solstice, ~December 21).
• Equator: Subsolar point aligns here during the March/September Equinoxes (~Mar 21 & Sep 23).
The subsolar point oscillates annually between the tropics. Only regions between these tropics experience direct overhead sun, resulting in significantly higher solar radiation intensity.
Azimuth & Elevation: Mapping the Sun
To precisely track the sun’s path, two angles are essential:
1. Solar Azimuth Angle: Sun’s horizontal direction, measured clockwise from True North (0°).
○ East: 90° | South: 180° | West: 270°.
2. Solar Elevation Angle: Sun’s height above the horizon (0° = horizon, 90° = overhead).
○ Varies with season and time of day.
The Sun’s Path in U.S. Skies
(Since the U.S. lies north of the Tropic of Cancer):
1. Solar Noon: Sun always appears due South (azimuth 180°).
2. Sunrise/Sunset:
○ Summer (June Solstice):
▪ Sunrise: Northeasterly | Sunset: Northwesterly
▪ Longest daylight; higher/longer solar arc.
○ Winter (December Solstice):
▪ Sunrise: Southeasterly | Sunset: Southwesterly
▪ Shortest daylight; very low solar arc.
○ Key Pattern: The sun’s daily arc always peaks due South at noon, and the entire arc favors the southern sky. Even when rising NE/setting NW in summer, the sun transits south at noon and spends most daylight hours in the southern sky.
3. Elevation Angle Variations:
○ Noon Elevation:
▪ June Solstice (Annual Max):
• ~75.5° (San Francisco, 38°N) | ~66° (Seattle, 47.5°N).
▪ December Solstice (Annual Min):
• ~28.5° (SF) | ~19° (Seattle; notably low).
▪ Equinoxes: Elevation = 90° – Your Latitude
• ~52° (SF) | ~42.5° (Seattle).
○ Daily Cycle: Rises from 0° at sunrise → peaks at solar noon → falls to 0° at sunset.
|
|
|
|
|


Conclusion: As clearly shown, throughout all 365 days, the sun’s arc over the U.S. peaks invariably due South at noon. For the vast majority of daylight hours—especially peak irradiance periods—the sun traverses the southern sky. Even in summer (NE rise → NW set), its core path and highest-energy period remain dominantly southern.
Q: When it's sunny, the angle is optimal, and there are no thick clouds—so why is the power output still low?
A: This is likely due to high-altitude clouds:
• Altostratus ("Frosted Glass Sky")
• Cirrus ("Feather/Filament Clouds")
Despite being thin and high, these clouds significantly reduce irradiance.
Scenario 1: The "Frosted Glass Sky" – Altostratus
• Appearance:
○ A uniform, grayish-white or pale blue "veil" or "frosted glass" layer covering the entire sky.
○ The sun appears as a softly glowing disk—visible without glare, even to the naked eye.
○ Objects cast faint or no shadows (direct light is scattered).
○ Feels like an "overcast" day, but ambient brightness remains high.
• Impact on Power Generation:
○ This veil comprises tiny water droplets/ice crystals that scatter direct sunlight into diffuse light, akin to sunlight filtered through frosted glass—warm but lacking intensity.

Scenario 2: "Feather/Filament Clouds" – Cirrus
• Appearance:
○ Delicate, wispy, feather-like, or hair-thin white clouds high in the sky, often semi-transparent.
○ The sun itself usually remains bright and sharply defined (due to cloud thinness and gaps).
○ Clouds appear pure white.
• Impact on Power Generation:
○ These high-altitude ice crystals act as microscopic prisms and mirrors, reflecting 10–30% of direct light back into space or scattering it away. They also filter specific light wavelengths critical for PV efficiency.
• Though blue sky is visible between clouds, total energy reaching solar panels is significantly reduced.
|
|
|


Proper installation is key to ensuring your solar system runs safely and efficiently. This means securely mounting your solar panels, using the correct cables, and verifying all electrical connections. Loose wiring or incompatible setups can lead to power loss — or even safety risks.
Don't worry — our experts have simplified the process so anyone can get it up and run smoothly.
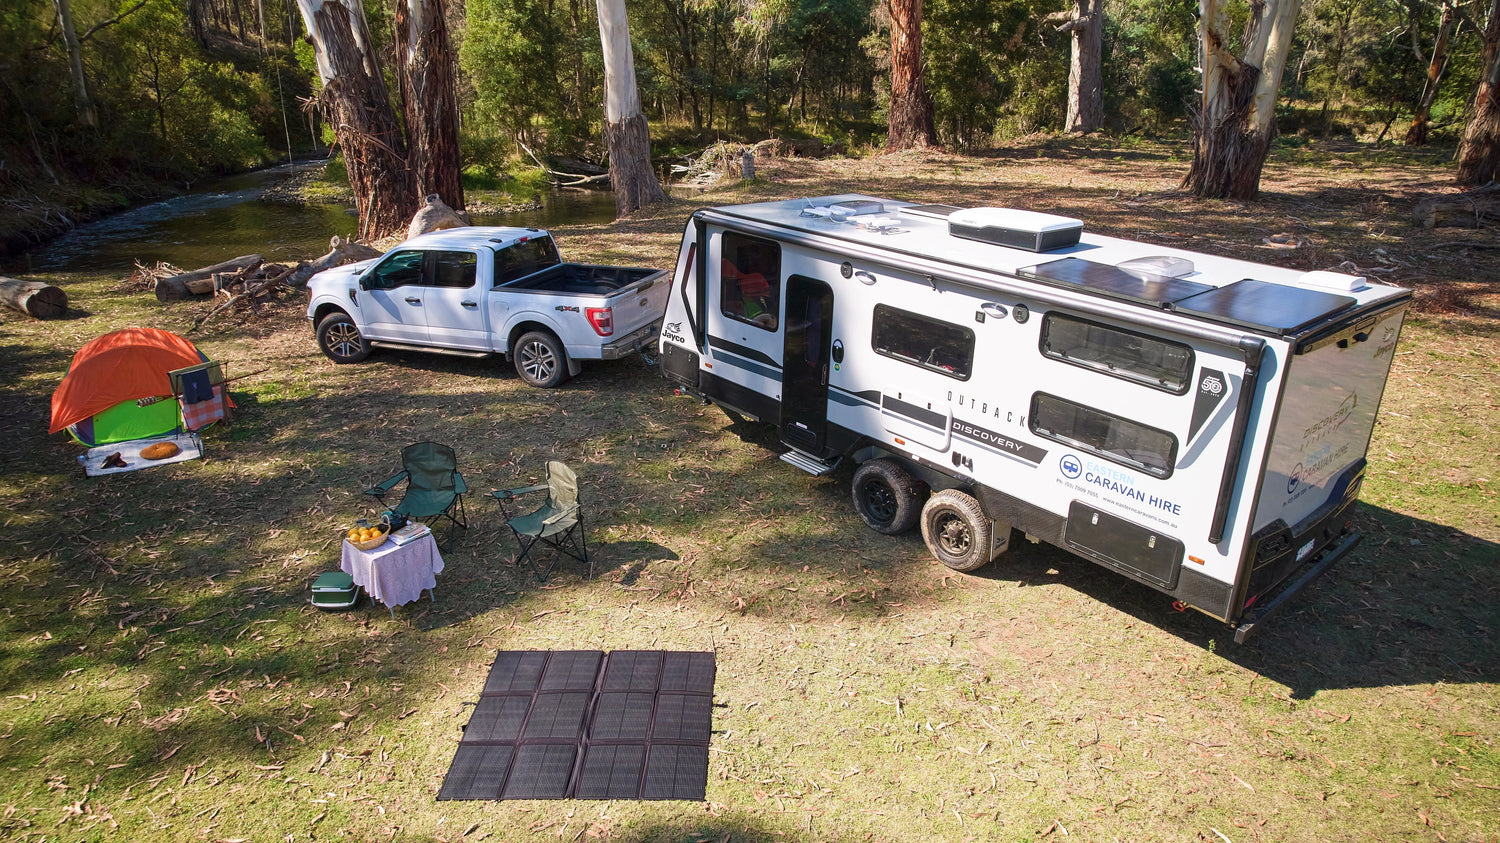
1. Connecting to a Power Station
Steps:
Ⅰ. Identify the input port type on your Power Station and select the appropriate adapter cable.
Ⅱ. Check the input voltage and current limits of your Power Station — especially if you're using multiple panels in series or parallel. Exceeding these limits can prevent charging or reduce efficiency.
Connection Sequence:
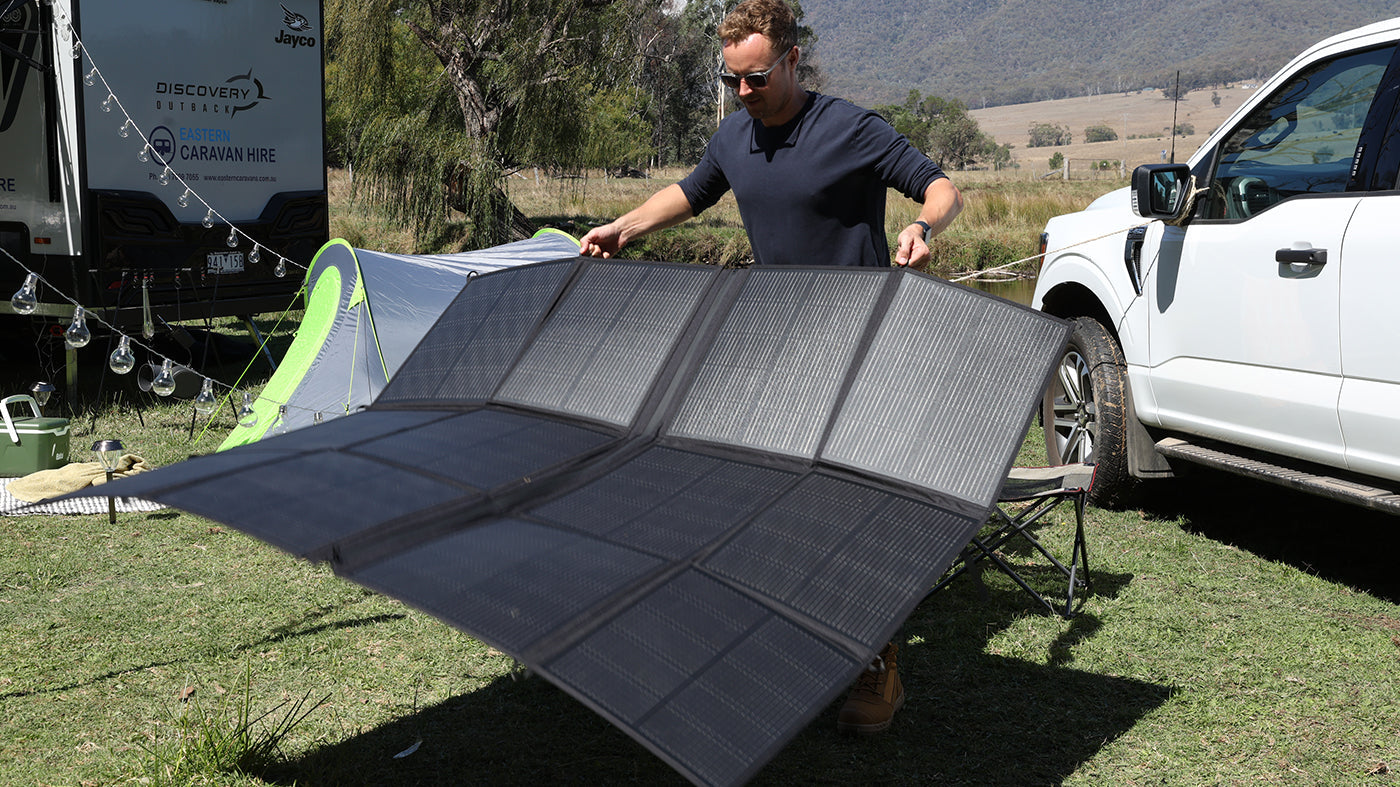
1. Connect the two sections of the SolarBag.
2. Plug the SolarBag’s output cable into the correct adapter.
3. Plug the adapter into the Power Station’s input port.
4. Finally, unfold the SolarBag and position it to face the sun.
2. Connecting to Batteries (via S1 Controller)
Steps:
Ⅰ. Check your battery's voltage (12V / 24V / 48V).
Ⅱ. Confirm the battery's input voltage and current specs — especially important when linking multiple S1 Controllers in series or parallel. Incompatible values can block charging.
Connection Sequence:
1. Connect the two SolarBag sections together.
2. Connect the output side of the S1 Controller to your battery terminals.
3. Connect the SolarBag to the input of the S1 Controller.
4. Unfold the SolarBag and align it toward the sun.
3. Troubleshooting: Not Charging or Power Output? Check These First
If your system isn't charging or powering correctly, go through this checklist:
• Is the panel in direct sunlight?
• Are there any clouds or haze (trees, poles, roof edges)?
• Are all cables (panel → controller → battery) securely connected?
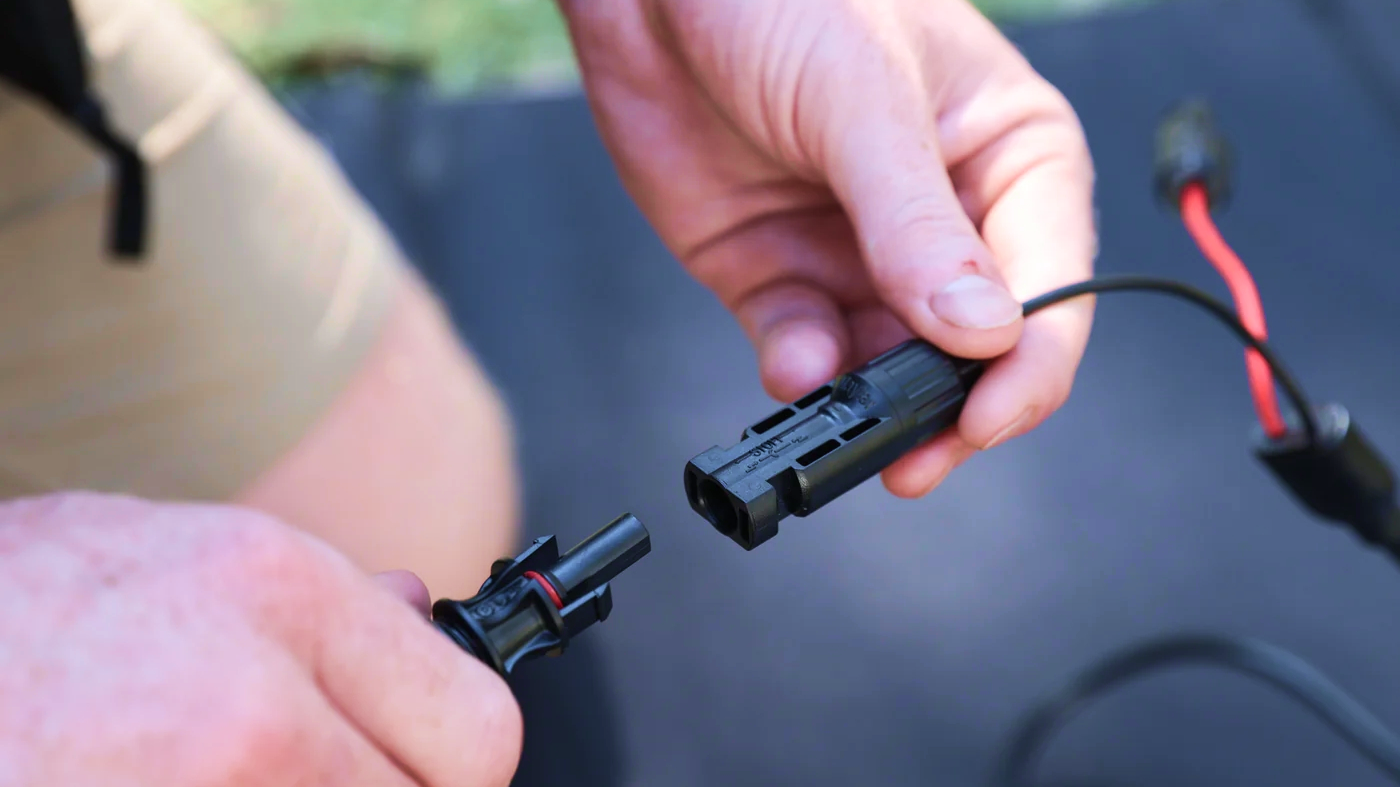
• Are MC4 connectors fully snapped into place?
• Are you using the correct cable gauge to handle current safely?
• Is the input voltage within the controller’s operating range?
• Does the controller’s output voltage match your battery?
○ (Example: a 15V output can’t charge a 24V battery)
• Is the battery already fully charged?
• Is it possibly damaged or in over-discharge protection mode?
5. Panel Shading or Physical Damage
• Are there any shadows falling across the panel?
• Are any cables frayed, cut, or loose?
• If a safety feature was triggered (due to improper connection), try:
○ Waiting 10 minutes, or
○ Allowing the battery to discharge slightly, then reconnect and try again.
Q: How do voltage and current change when solar panels are connected in series or parallel?
A:
1. Solar Panels in Series:
Current remains unchanged; voltage adds up.
Example: Connecting three 20V/3A solar panels in series to the S1 controller results in an input of 60V/3A to the S1. The same applies to PowerStation.
2. Solar Panels in Parallel:
Voltage remains unchanged; current adds up.
Example: Connecting three 20V/3A solar panels parallel to the S1 controller results in an input of 20V/9A to the S1. The same applies to PowerStation.
Important Note: These rules apply only to identical solar panels. Mixing panels of different specifications or brands in series/parallel is strictly prohibited for non-professionals.
Determining System Voltage with S1 Battery Connection
Auto-detection: 12V/24V/48V
1. 12V Battery:
○ Required solar array Open-Circuit Voltage (Voc) ≥15V
○ Example: Single 10Voc panel → fails (<15V).
Two 10Voc panels → 20Voc when connected to separate S1 controllers in series → success.
2. 24V Battery: Voc ≥36V
3. 48V Battery: Voc ≥72V
Voltage Constraint Warning:
S1 controller maximum withstand voltage = 50V. Therefore:
• For 48V systems:
○ ❌ Single S1 prohibited (72Voc > 50V max)
○ ❌ Parallel S1 prohibited (voltage per group >50V risk)
○ ✅ Series S1 configuration mandatory
Regular maintenance helps your solar panels run efficiently and last longer. Just like cleaning a car windshield helps you to see clearly, cleaning your solar panel ensures it gets maximum sunlight. A bit of caring for it can save you from costly issues later.
Dust, dirt, snow, or fallen leaves can block sunlight and reduce power output. During active use — especially in dusty or leafy environments — daily or weekly cleaning is recommended.
Cleaning Tips:
• Wipe gently: Use a soft damp cloth or sponge to clean the panel surface. Remove dust, bird droppings, leaves, or other debris.
• Avoid damage: Never use abrasive cleaners, scrubbing tools, or pressure washers — they can damage the panel’s protective coating.
• Protect the connectors: Keep all plug connectors clean and dry. Prevent sand or moisture from entering.
Ensure the panel is completely dry before folding or storing.
• Storage care: After cleaning, store panels in a cool, dry, shaded location, away from direct sunlight.
Solar panels — especially portable, foldable ones — are sensitive electronic devices. Here’s how to protect them:
• Don’t step or apply heavy pressure: Even with a protective film, the internal silicon cells can develop micro-cracks from pressure — compromising efficiency and lifespan.
• Avoid scratches from sharp objects: Keep knives, tools, or keys away when storing or handling your panels. Always use soft cloth for cleaning — not steel wool or scouring pads.
• Fold correctly: For flexible panels, only fold along the designed creases. Avoid bending in the wrong direction or forcing folds, as this may damage internal wiring or layers.
• Protect the cables: When storing or transporting, avoid tight knots or sharp bends in the cables. Repeated stress can lead to internal wire breakage.
3. Environmental Protection Tips
1. Avoid Extreme Temperatures:
• High heat (>80°C / 176°F): Avoid leaving panels exposed to scorching surfaces (like asphalt or vehicle roofs in summer). Overheating may cause delamination or warping.
• Freezing conditions: Always remove snow or ice before storing. Frozen moisture can expand and create surface cracks.
2. Severe Weather:
• Hail or strong winds? Fold up and pack away your panel immediately to avoid impact damage.
• Using near the ocean? Rinse with freshwater after use to prevent salt corrosion of wiring and connectors.
3. Prevent Dust & Sand Accumulation:
• Always place the panel at a tilt angle to reduce sand buildup.
• Use an air blower (not a cloth) to remove sand — rubbing sand directly on the surface can cause fine scratches that reduce light absorption.
Appendix 1:FAQ for detailed usage.
|
Category |
Issue |
Resolution |
Remarks |
|
General
|
What is the maximum power output of this solar panel?
|
This solar panel has a maximum peak power of 400W (measured under Standard Test Conditions (STC): Irradiance 1000W/m², Temperature 25°C, AM1.5). For enhanced portability, the product features an innovative split design: A zipper allows the 400W panel to be easily separated into two independent 200W solar panels (200W + 200W).
|
|
|
"What are its dimensions and weight? Is it portable?"
|
Product Dimensions (Unfolded): 170 x 160 x 0.4 cm (66.93 x 62.99 x 0.16 in) When unzipped into two separate panels, all dimensions and weight are reduced by half. Marketing Description:
|
|
|
|
What's in the box
|
For "400W Portable SolarBag Kit" Purchase,Package Includes: 400w Solarbag x1 SolexBrick S1 x1 Solar Adapter Cables x1 Mc4 connector Tool x1 Carabinerx1 Shoulder Straps x1 Installation Braket Kit x1 MountingBracket x1 400W Portable SolarBag User Manual x1 For "400W Portable SolarBag" Purchase,Package Includes: 400w Solarbag x1 Shoulder Straps x1 Carabinerx1 User Manual×1
|
|
|
|
Can the solar panel itself store electricity?
|
Solar panels are devices that convert light into electricity and do not inherently possess energy storage capability. The generated electricity needs to be delivered to batteries (such as power banks, RV batteries, lead-acid batteries, etc.). Generally, they cannot directly power loads; this requires power conversion devices. However, our product features USB and Type-C ports for powering small smart devices. Important: Never connect the solar panel directly to a load, or connect the S1 directly to a load. |
|
|
|
For what applications is this solar panel suitable?
|
It is ideal for powering various outdoor activities or off-grid scenarios, such as: • RV/Campervan travel • Camping, hiking, picnics (requires pairing with a PowerStation) • Home emergency backup power • Replenishing PowerStations (e.g., 1000Wh or larger models) In fact, when you purchase the 400W Portable SolarBag Kit, you can connect it to standard 12V/24V batteries. Its application scenarios are extremely broad – you can charge any battery-powered load |
|
|
|
"What are the differences between this portable solar panel and other foldable solar panels?" |
① True Convenience: 400W output yet 50% lighter than solar panels with comparable power ratings. ② More Possibilities: Plug-and-play simplicity – No complicated setup. Just connect the 400W SolarBag to your PowerStation to charge. |
|
|
|
What do I get with the 400W Portable SolarBag Kit compared to just a SolarBag?
|
Because the Kit includes an S1 controller, you can: The S1 controller unlocks new possibilities. For solar enthusiasts, it’s a money-saving essential – making the Kit your smartest investment. |
|
|
|
Specifications & Performance
|
Is 400W the actual power achievable?
|
400W is the peak power (under STC conditions). The actual output power will be affected by various factors, such as light intensity (time of day, weather, season), solar incidence angle, ambient temperature, cable length, controller efficiency, and battery state. Under ideal conditions (clear sky, solar noon), it typically reaches about 90% of the peak power. Output power decreases significantly during cloudy weather or at dawn/dusk. |
|
|
What is its conversion efficiency?
|
This product uses high-efficiency monocrystalline solar cells with a conversion efficiency as high as 25%. |
|
|
|
What is the output voltage and current?
|
The default product configuration connects two 200W panels in series. The parameters are as follows: Open Circuit Voltage: 42V Short Circuit Current: 11.8A Optimum Operating Voltage: 36V When connected in parallel, the parameters become: Open Circuit Voltage: 21V Short Circuit Current: 23.6A Optimum Operating Voltage: 18V |
|
|
|
What output voltage and current can the solar panel's USB ports provide?
|
|
|
|
|
Can it operate under cloudy or low-light conditions?
|
Yes. The solar panel can generate electricity as long as visible light is present, though power output will be significantly lower than on sunny days. During cloudy or overcast conditions, output may drop to around 30% of peak power. It cannot generate electricity in complete darkness. |
|
|
|
Installation & Operation
|
How to use this solar panel? Does it require installation?
|
Usage is very straightforward: 1. Plug the S1's output port into your target battery. 2. Connect the panel's output cable to the S1 controller (required for battery charging). 3. Unfold the solar panel and place it in a sunny, unobstructed location (ensure no shading). The S1 will automatically manage the charging process. Note: PowerStation models can connect directly without a controller. ⚠️ CAUTION: Always connect in this sequence: ① Battery → ② S1 Controller → ③ Solar Panel |
|
|
Is it waterproof? Can it be used in rainy conditions?
|
This 400W solar bag has achieved an IP65 protection rating, while its junction box (USB) is IPX4 rated for splash resistance. Therefore, it can withstand water splashes and light rain exposure, but we do not recommend using it in heavy rain conditions. |
|
|
|
Can I use my own controller with it? |
Yes, but you must ensure your controller is compatible with the solar panel. Verify that the panel's voltage and current ratings match your controller's specifications. We recommend using an MPPT controller, which maximizes power output from the solar panel. For optimal performance, we advise pairing the panel with our S1 controller. Its superior compatibility and performance are guaranteed through rigorous compatibility testing and validation. |
|
|
|
Compatibility & Charging
|
What devices can be charged?
|
• High-capacity portable power stations (e.g., EcoFlow, Jackery, Bluetti, Anker) - Direct connection |
|
|
Which power stations are compatible?
|
EcoFlow, Jackery, Bluetti, Anker, and similar brands are supported. However, you must verify their adapter interface requirements and purchase compatible adapter cables separately (e.g., MC4 to XT60, Anderson connectors). |
|
|
|
Can I mix Solarbag with other solar panels? |
Generally, mixing solar panels of different specifications or brands is not allowed, as it can cause panel malfunctions or even damage. However, if you connect each panel separately to the S1 controller, the S1 can manage each solar panel individually. This makes them compatible with each other, enabling connection to the battery. For specific S1 usage instructions and methods for series/parallel connections, please refer to the manual. |
|
|
|
Can it charge my electric vehicle directly?
|
Theoretically possible, but practically challenging. Additionally, a 400W output is far too low for an EV’s large battery pack.
|
|
|
|
How long does it take to fully charge a [e.g., 1000Wh] battery?
|
Charging time depends on: • Capacity (Wh) of the power station: e.g., 1000Wh. • Actual output power of the solar panels: assuming an average of 350W on sunny days. • Controller efficiency: assuming the S1 charger is 95% efficient. • Formula estimate: • Example: Note that this is an ideal estimate — actual time depends on real-world sunlight conditions.
|
|
|
|
How to Gain the Maximum Output of OptiSolex 400W Portable SolarBag?
|
How to maximize the power generation efficiency of this solar panel? • Avoid shading: Ensure the entire panel surface is exposed to direct sunlight throughout the day. • Keep panels clean: Regularly clean the panel surface. • Optimize cables: Use sufficiently thick and shortest possible cables to minimize resistive losses. |
|
|
|
Can multiple identical solar panels be connected in series or parallel?
|
Yes, identical solar panels can be connected in series and parallel. However, it’s critical to ensure that after connection, the voltage and current remain within the supported input ranges of your controller or PowerStation. |
|
|
|
How do voltage and current change when solar panels are connected in series or parallel?
|
1. Solar Panels in Series: 2. Solar Panels in Parallel: Important Note: These rules apply only to identical solar panels. Mixing panels of different specifications or brands in series/parallel is strictly prohibited for non-professionals. |
|
|
|
Why does the controller show "no charging" after connection?
|
Please troubleshoot using these steps: 1. Sunlight conditions: ○ Is the system in direct sunlight without shading? 2. Connections: ○ Are all cables (panel → controller → battery) securely and correctly connected? ○ Are MC4 connectors fully inserted and locked? 3. Controller settings: ○ Is the panel’s input voltage/power within the controller’s acceptable range? ○ Does the system’s output voltage match the controller’s output range? 4. Battery status: ○ Is the battery already fully charged? ○ Is the battery damaged or in over-discharge protection mode? 5. Shading & damage: ○ Is any part of the panel shaded (even partially)? ○ Are there visible damages to cables? 6. Protection triggers: ○ If operations were non-standard, the controller may enter protection mode. ○ Wait at least 10 minutes or discharge the battery slightly, then check if charging resumes. If charging doesn’t start after all checks, contact customer support. |
|
|
|
Safety, Maintenance & Warranty |
Is it safe to use? What precautions should I take?
|
Safety is our top priority. When using the S1 controller, our protection mechanisms prevent issues like overcharging and short circuits. For absolute safety, please note: Critical precautions during operation: 1. High surface temperature: 2. Controller handling: ○ Avoid touching the S1 controller’s surface during use (risk of burns). ○ Ensure adequate ventilation around the controller. ○ Avoid direct sunlight exposure on the controller. 3. Connection/disconnection sequence: ○ When connecting: ○ When disconnecting: Failure to follow this sequence may cause equipment damage or safety hazards. |
|
|
How to Clean and Maintain Solar Panels?
|
• Regular cleaning: Gently wipe the glass surface with a soft damp cloth or sponge to remove dust, bird droppings, leaves, or other debris. Never use abrasive cleaners or pressure washers. • Protect connectors: Keep connectors dry and clean; prevent sand/dust ingress. Ensure panels are completely dry before storage. • Long-term storage: After cleaning, store panels in a cool, dry place away from direct sunlight |
|
|
|
What is the product warranty period? What does the warranty cover? |
We offer a 10-year warranty for the SolexBrick-S1, and a 3-year warranty for the 400W Portable SolarBag. |
|

Appendix 2: U.S. Regional & Seasonal Placement Parameters
The following is a table of core parameters for placing portable solar panels in different regions and seasons in the United States, integrating tilt angles, orientations, and key considerations for quick reference:
Table Description:
- The tilt angle is based on the principle of "local latitude ± 15°" (15° less in summer, 15° more in winter, approximately equal to latitude in spring and autumn). In practice, it can be flexibly adjusted according to the real-time sun angle (an error of ±5° has little impact).
- The orientation is based on "due south". In practice, the direction angle can be adjusted according to the east-west movement of the sun to maximize the receiving time.
|
Region |
Season |
Recommended Tilt Angle (Reference Value) |
|
Northeast |
Spring (March-May) |
40°-45° |
|
|
Summer (June-August) |
25°-30° |
|
|
Autumn (September-November) |
40°-45° |
|
|
Winter (December-February) |
55°-60° |
|
South |
Spring (March-May) |
25°-35° |
|
|
Summer (June-August) |
10°-20° |
|
|
Autumn (September-November) |
25°-35° |
|
|
Winter (December-February) |
40°-50° |
|
West |
Spring (March-May) |
30°-40° |
|
|
Summer (June-August) |
15°-25° |
|
|
Autumn (September-November) |
30°-40° |
|
|
Winter (December-February) |
45°-55° |
|
Midwest |
Spring (March-May) |
35°-45° |
|
|
Summer (June-August) |
20°-30° |
|
|
Autumn (September-November) |
35°-45° |
|
|
Winter (December-February) |
50°-60° |
|
Alaska |
Summer (June-August) |
45°-60° |
|
(Note: The transition period of spring and autumn is short, adjust with reference to winter and summer) |
Winter (December-February) |
70°-80° (nearly vertical)
|
|
Hawaii |
Whole year (fine-tuned by season) |
10°-20° |
Appendix 3: Specific Information on Estimated Power Generation in Various Regions of the United States
The following is a classification of the 50 states in the United States by latitude range, with estimates of the approximate noon irradiance in July and the corresponding power generation of 440-watt solar panels:
Note: The following data are all estimated for reference only; specific data shall be subject to actual measurement.
- 20°N-30°N
- State of Hawaii: Latitude range is approximately 18°55′N - 22°15′N; Noon irradiance in July is approximately 900 - 950 W/m²; Power generation is approximately 396 - 418 watts
- State of Florida: Latitude range is approximately 27°59′N - 31°N; Noon irradiance in July is approximately 880 - 920 W/m²; Power generation is approximately 387.2 - 404.8 watts
- 30°N-40°N
- State of Louisiana: Latitude range is approximately 29°30′N - 33°N; Noon irradiance in July is approximately 850 - 900 W/m²; Power generation is approximately 374 - 396 watts
- State of Mississippi: Latitude range is approximately 30°13′N - 35°N; Noon irradiance in July is approximately 830 - 880 W/m²; Power generation is approximately 365.2 - 387.2 watts
- State of Alabama: Latitude range is approximately 30°16′N - 35°N; Noon irradiance in July is approximately 830 - 880 W/m²; Power generation is approximately 365.2 - 387.2 watts
- State of Texas: Latitude range is approximately 25°50′N - 36°30′N; Noon irradiance in July is approximately 820 - 870 W/m²; Power generation is approximately 360.8 - 382.8 watts
- State of New Mexico: Latitude range is approximately 31°50′N - 37°N; Noon irradiance in July is approximately 810 - 860 W/m²; Power generation is approximately 356.4 - 378.4 watts
- State of Arizona: Latitude range is approximately 31°N - 37°N; Noon irradiance in July is approximately 810 - 860 W/m²; Power generation is approximately 356.4 - 378.4 watts
- State of Arkansas: Latitude range is approximately 33°N - 36°30′N; Noon irradiance in July is approximately 820 - 870 W/m²; Power generation is approximately 360.8 - 382.8 watts
- State of Tennessee: Latitude range is approximately 35°N - 36°30′N; Noon irradiance in July is approximately 820 - 870 W/m²; Power generation is approximately 360.8 - 382.8 watts
- State of Oklahoma: Latitude range is approximately 33°35′N - 37°N; Noon irradiance in July is approximately 810 - 860 W/m²; Power generation is approximately 356.4 - 378.4 watts
- State of California: Latitude range is approximately 32°30′N - 42°N; Noon irradiance in July is approximately 800 - 850 W/m²; Power generation is approximately 352 - 374 watts
- State of Georgia: Latitude range is approximately 30°31′N - 35°N; Noon irradiance in July is approximately 830 - 880 W/m²; Power generation is approximately 365.2 - 387.2 watts
- State of South Carolina: Latitude range is approximately 32°N - 35°N; Noon irradiance in July is approximately 830 - 880 W/m²; Power generation is approximately 365.2 - 387.2 watts
- State of Missouri: Latitude range is approximately 36°N - 39°30′N; Noon irradiance in July is approximately 800 - 850 W/m²; Power generation is approximately 352 - 374 watts
- State of Kansas: Latitude range is approximately 37°N - 39°30′N; Noon irradiance in July is approximately 800 - 850 W/m²; Power generation is approximately 352 - 374 watts
- State of Kentucky: Latitude range is approximately 36°30′N - 39°30′N; Noon irradiance in July is approximately 800 - 850 W/m²; Power generation is approximately 352 - 374 watts
- State of Virginia: Latitude range is approximately 36°30′N - 39°30′N; Noon irradiance in July is approximately 800 - 850 W/m²; Power generation is approximately 352 - 374 watts
- State of West Virginia: Latitude range is approximately 37°N - 39°30′N; Noon irradiance in July is approximately 800 - 850 W/m²; Power generation is approximately 352 - 374 watts
- State of Delaware: Latitude range is approximately 38°30′N - 39°30′N; Noon irradiance in July is approximately 800 - 850 W/m²; Power generation is approximately 352 - 374 watts
- State of Maryland: Latitude range is approximately 38°N - 39°30′N; Noon irradiance in July is approximately 800 - 850 W/m²; Power generation is approximately 352 - 374 watts
- State of Nevada: Latitude range is approximately 35°N - 42°N; Noon irradiance in July is approximately 800 - 850 W/m²; Power generation is approximately 352 - 374 watts
- State of Colorado: Latitude range is approximately 37°N - 41°N; Noon irradiance in July is approximately 800 - 850 W/m²; Power generation is approximately 352 - 374 watts
- State of Utah: Latitude range is approximately 37°N - 41°N; Noon irradiance in July is approximately 800 - 850 W/m²; Power generation is approximately 352 - 374 watts
- State of New Jersey: Latitude range is approximately 38°50′N - 41°N; Noon irradiance in July is approximately 800 - 850 W/m²; Power generation is approximately 352 - 374 watts
- 40°N-50°N
- State of New York: Latitude range is approximately 40°26′N - 45°N; Noon irradiance in July is approximately 800 - 850 W/m²; Power generation is approximately 352 - 374 watts
- State of Illinois: Latitude range is approximately 40°N - 42°30′N; Noon irradiance in July is approximately 800 - 850 W/m²; Power generation is approximately 352 - 374 watts
- State of Indiana: Latitude range is approximately 40°N - 42°N; Noon irradiance in July is approximately 800 - 850 W/m²; Power generation is approximately 352 - 374 watts
- State of Ohio: Latitude range is approximately 40°N - 42°30′N; Noon irradiance in July is approximately 800 - 850 W/m²; Power generation is approximately 352 - 374 watts
- State of Nebraska: Latitude range is approximately 40°N - 43°N; Noon irradiance in July is approximately 800 - 850 W/m²; Power generation is approximately 352 - 374 watts
- State of Pennsylvania: Latitude range is approximately 40°N - 42°30′N; Noon irradiance in July is approximately 800 - 850 W/m²; Power generation is approximately 352 - 374 watts
- State of Connecticut: Latitude range is approximately 41°N - 42°30′N; Noon irradiance in July is approximately 800 - 850 W/m²; Power generation is approximately 352 - 374 watts
- State of Rhode Island: Latitude range is approximately 41°30′N - 42°N; Noon irradiance in July is approximately 800 - 850 W/m²; Power generation is approximately 352 - 374 watts
- State of Iowa: Latitude range is approximately 41°30′N - 43°30′N; Noon irradiance in July is approximately 800 - 850 W/m²; Power generation is approximately 352 - 374 watts
- State of Massachusetts: Latitude range is approximately 42°N - 43°30′N; Noon irradiance in July is approximately 800 - 850 W/m²; Power generation is approximately 352 - 374 watts
- State of Wisconsin: Latitude range is approximately 43°N - 46°N; Noon irradiance in July is approximately 780 - 830 W/m²; Power generation is approximately 343.2 - 365.2 watts
- State of South Dakota: Latitude range is approximately 43°N - 46°N; Noon irradiance in July is approximately 780 - 830 W/m²; Power generation is approximately 343.2 - 365.2 watts
- State of Vermont: Latitude range is approximately 43°30′N - 45°30′N; Noon irradiance in July is approximately 780 - 830 W/m²; Power generation is approximately 343.2 - 365.2 watts
- State of Idaho: Latitude range is approximately 43°N - 49°N; Noon irradiance in July is approximately 760 - 810 W/m²; Power generation is approximately 334.4 - 356.4 watts
- State of Michigan: Latitude range is approximately 42°N - 47°N; Noon irradiance in July is approximately 780 - 830 W/m²; Power generation is approximately 343.2 - 365.2 watts
- State of Minnesota: Latitude range is approximately 44°N - 49°N; Noon irradiance in July is approximately 760 - 810 W/m²; Power generation is approximately 334.4 - 356.4 watts
- State of Montana: Latitude range is approximately 45°N - 49°N; Noon irradiance in July is approximately 760 - 810 W/m²; Power generation is approximately 334.4 - 356.4 watts
- State of North Dakota: Latitude range is approximately 46°N - 49°N; Noon irradiance in July is approximately 760 - 810 W/m²; Power generation is approximately 334.4 - 356.4 watts
- State of Washington: Latitude range is approximately 46°54′N - 49°N; Noon irradiance in July is approximately 700 - 750 W/m²; Power generation is approximately 308 - 330 watts
- State of Oregon: Latitude range is approximately 42°N - 46°N; Noon irradiance in July is approximately 780 - 830 W/m²; Power generation is approximately 343.2 - 365.2 watts
- State of New Hampshire: Latitude range is approximately 43°N - 45°30′N; Noon irradiance in July is approximately 780 - 830 W/m²; Power generation is approximately 343.2 - 365.2 watts
- State of Maine: Latitude range is approximately 44°N - 48°N; Noon irradiance in July is approximately 760 - 810 W/m²; Power generation is approximately 334.4 - 356.4 watts
- 50°N-60°N
- State of Alaska: Latitude range is approximately 51°N - 71°50′N; Noon irradiance in July is approximately 600 - 650 W/m²; Power generation is approximately 264 - 286 watts